Medu Vada Recipe Without Yeast Easy Home Style
Medu Vada Recipe Without Yeast Cooking Process Home Easy
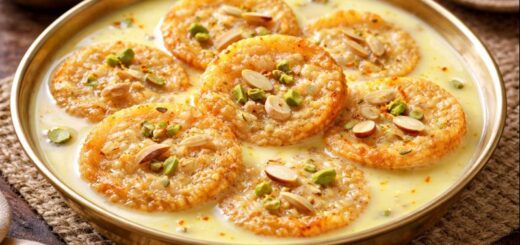
Medu Vada Recipe Without yeast and without fermentation is a classic South Indian favorite that you can make right at home with simple ingredients and easy steps. This Medu Vada Recipe Without relies on soaked urad dal, aromatic spices, and the right frying technique to give you crispy-on-the-outside, soft-on-the-inside vadas that pair perfectly with sambar and chutney. According to the Wikipedia article on Medu vada, this iconic fritter (also known as ulundu vadai, garelu, or uzhunnu vada) is traditionally made from urad dal batter and served warm as breakfast or snack. I remember the first time I made these at home—what surprised me was how much flavor depth you can get even without yeast or fermentation!
Recipe Card
| Prep Time | 45 minutes (including soaking) |
|---|---|
| Cook Time | 20 minutes |
| Servings | 10–12 vadas |
| Difficulty | Easy–Medium |
Ingredients With Exact Quantities
- 1 cup whole urad dal (black gram, soaked)
- 2–3 cups water for soaking
- 1 small onion, finely chopped
- 1–2 green chilies, finely chopped
- 1 teaspoon freshly grated ginger
- 8–10 curry leaves, finely chopped
- ¼ teaspoon asafoetida (hing)
- 1 teaspoon black pepper or cumin seeds (optional)
- Salt to taste (about 1 teaspoon)
- Oil for deep frying (about 2–3 cups)
Step-By-Step Instructions With Timings
1. Soak The Dal (30–35 mins)
Rinse 1 cup of whole urad dal until water runs clear. Add 2–3 cups of water and soak the dal for about 30–35 minutes. The longer the soak, the fluffier the vadas will be. I have soaked my dal even for 40 minutes when I’m planning a big breakfast!
2. Grind To A Fluffy Batter (10 mins)
Drain the soaked dal and reserve the water. In a mixer or wet grinder, grind the dal into a smooth, thick batter adding water just a tablespoon at a time—use only minimal water so the batter stays firm and airy. You’re aiming for a light, fluffy consistency that can hold shape. This is the heart of the Medu Vada Recipe Without fermentation—it skips the overnight rest and still gives lift from aeration during grinding.
3. Add Flavors (2 mins)
Transfer the batter to a bowl and mix in chopped onion, green chilies, ginger, curry leaves, asafoetida, cumin or pepper seeds (if using), and salt. Mix thoroughly so all spices are evenly distributed.
4. Heat The Oil (2 mins)
In a deep frying pan or kadai, add enough oil to submerge the vadas. Heat over medium flame. To test if the oil is ready, drop a small dollop of batter—if it rises steadily and sizzles, you’re good.
5. Shape And Fry The Vadas (10 mins)
Wet your hands and take a small portion of batter. Flatten it on your palm and make a small hole in the centre—the classic doughnut shape. Gently slide the shaped vada into hot oil. Fry a few at a time, about 3–4 per batch. Fry each side for about 3–4 minutes until golden brown and crisp. Remove with a slotted spoon and drain on paper towels.
Pro Tips From Personal Cooking Experience
- When I visited my aunt in Chennai, she told me the secret to crisp vadas is keeping the batter at a thick yet aerated consistency—too watery and they will absorb oil.
- Warm oil is important: medium heat ensures the vada cooks through without burning the outside.
- If batter seems sticky, add just a tablespoon of rice flour for better shaping; this has helped me when my batter turned runny.
- Serve immediately for best texture—these vadas crisp up fastest right after frying.
Chef’s Notes
Substitutions
- For a lighter version, you can air-fry the shaped vadas at 190 °C (375 °F) for 12–15 minutes, flipping once—less oil but still crispy.
- If whole urad dal isn’t available, you can experiment with urad dal flour; soak briefly and follow similar steps (as suggested in other instant methods).
- Add finely chopped vegetables (carrot, peas) for extra nutrition and color.
Storage Tips
- Leftover vadas can be stored in an airtight container in the refrigerator for up to 2 days. Reheat in an oven or air fryer to restore crispness before serving.
- Freeze unfried shaped vadas on a tray for up to a month; fry directly from frozen for quick snack prep.
Nutritional Information Per Serving
Approximate values per 1 Medu Vada (based on common nutrition databases): Calories: ~120 – 150 kcal; Protein: ~4–7 g; Carbohydrates: ~8–15 g; Fat: ~6–10 g; Fiber: ~1–3 g. This reflects typical profiles for deep-fried urad dal vadas.
Why This Medu Vada Recipe Without Yeast Works
This version of Medu Vada Recipe Without yeast or fermentation works because the batter’s lightness comes from thorough grinding and proper air incorporation. Many traditional recipes rely on yeast or fermentation to create a soft texture, but with the right method you can achieve a similar result in under an hour. I personally recommend this technique for busy mornings when you want authentic South Indian taste without waiting overnight.
Serving Suggestions
- Serve with steaming hot sambar and coconut chutney for breakfast or snacks.
- A small bowl of yogurt on the side adds a cooling contrast.
- Pair with filter coffee for a classic South Indian morning spread.
Frequently Asked Questions
Can I make Medu Vada without deep frying?
Yes. As mentioned, air frying or shallow frying gives a healthier alternative though texture may slightly differ from deep-fried vadas.
Do I need to ferment the batter?
Not in this Medu Vada Recipe Without yeast or fermentation. Proper grinding and aeration give you the soft texture.
Why is my batter too watery?
Use minimal water when grinding and sprinkle water only as needed; batter should be thick enough to hold shape.
Enjoy this delicious homestyle Medu Vada Recipe Without yeast and experience the crunch and softness that makes this dish a South Indian breakfast legend!