Wheat Karam Gavvalu Recipe: Crispy Andhra Shells
Wheat karam gavvalu are small, spicy Andhra snacks made by rolling firm atta dough into ridged shells and frying them until crisp. This version keeps the original wheat flour, fine semolina, chilli, pepper and ajwain combination. The key is to shape small shells and cook their centres without scorching the outside.
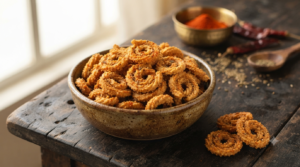
Crispy wheat karam gavvalu made with whole wheat flour, semolina, red chilli and aromatic spices, shaped into traditional Andhra-style shells.
Plan enough time for shaping and several frying batches. The times below are planning estimates, not results from a newly tested batch. Likewise, the shell count and storage life have not been independently measured for this recipe.
Wheat karam gavvalu at a glance
- Flour: Whole wheat atta with fine semolina (sooji or rava).
- Flavour: Red chilli, black pepper, ajwain and salt.
- Shape: Small, ridged curls made on a gavvalu peeta or a clean fork.
- Cooking: Deep-fry in small batches over controlled heat.
- Total planning time: About 90–120 minutes before final cooling, depending on batch size.
- Yield: Not tested; count the finished shells because portion size varies.
- Allergens: Wheat and gluten are present in both the atta and the semolina.
Do not rely on a 75-minute total. Even without cooling, mixing, resting, shaping, heating and multiple frying batches take longer when one person does them in sequence.
| Stage | Planning estimate | What changes it |
|---|---|---|
| Mix and knead | 10 minutes | How quickly the dough comes together |
| Rest dough | 25 minutes | Keep covered |
| Shape shells | 20–25 minutes | Practice and number of helpers |
| Heat frying oil | 5–10 minutes | Pan and burner |
| Fry batches | 30–50 minutes | Pan capacity and shell thickness |
| Total | 90–120 minutes | Plus cooling before packing |
Here is why the frying stage matters. If you shape 72 pieces and fry 12 at once, you need six batches. Five minutes per batch already totals 30 minutes, before draining or adjusting the heat. That is an arithmetic example, not a tested yield or guaranteed frying time.
Karam gavvalu versus teepi gavvalu
Both snacks use the familiar shell shape, but their flavours come from different steps. In wheat karam gavvalu, the seasoning sits inside the dough. Teepi gavvalu usually gets its sweetness from a syrup coating after frying.
| Feature | Karam gavvalu | Teepi gavvalu |
|---|---|---|
| Flavour | Chilli, pepper and ajwain | Jaggery or sugar syrup |
| Finish | Fried without a syrup coat | Coated after frying |
| Key texture risk | Undercooked thick centres | Moist or sticky syrup coating |
For the sweet variation, see our wheat flour gavvalu with jaggery syrup. It needs a separate syrup step, so do not treat the two dough methods as identical.
Ingredients for wheat karam gavvalu
This wheat karam gavvalu ingredient list keeps the original proportions. Add water gradually because atta brands and semolina textures absorb it differently. There is no verified finished-shell count for these quantities.
- Whole wheat flour (atta) – 2 cups, approximately 240 g
- Fine semolina (sooji or rava) – ½ cup
- Red chilli powder – 1 teaspoon, adjusted to taste
- Black pepper powder – 1 teaspoon
- Ajwain (carom seeds) – 1 teaspoon, lightly crushed
- Salt – 1 teaspoon, or to taste
- Neutral cooking oil for the dough – 2 tablespoons
- Water – up to about ¾ cup, added little by little as needed
- Fresh frying oil – enough for a safe depth in your deep, stable kadai; the volume depends on its diameter
The original combination has a four-to-one volume ratio of atta to semolina. Semolina adds a slightly coarser bite, while the oil helps keep the dough less tough. Neither ingredient guarantees crispness if the shells are thick or the oil temperature drifts.
Allergen note: Atta and regular sooji both come from wheat, so this is not gluten-free. Check packaged spices for additional allergen warnings, especially when serving someone with a food allergy.
How to make wheat karam gavvalu step by step
Step 1: Mix and knead the dough
Combine atta, semolina, chilli powder, pepper, ajwain and salt in a wide bowl. Gently warm the two tablespoons of oil, but do not let it shimmer or smoke. Stir it into the flour with a spoon. Touch the mixture only after it has cooled enough to handle safely.
Add water in small splashes, mixing until a firm dough forms. Knead briefly until it holds together. It should feel firmer than chapati dough, yet not so dry that the edges split as you roll them.
Raw-dough safety: Do not taste raw flour or uncooked dough. Taste only after thorough cooking and cooling.
Step 2: Rest the dough under a cover
Cover the bowl and rest the dough for about 25 minutes. The rest gives the flour and semolina time to absorb moisture. If the dough feels sticky afterwards, dust your hands lightly with atta instead of adding much more flour at once.
Step 3: Shape small shells
Pinch off small, roughly marble-sized pieces. Press one onto a clean, food-safe gavvalu peeta, also called a gavvalu chekka. Push it across the ridges with your thumb so the dough curls into a small shell.
A clean fork also works when you do not own the board, although its ridges may look shallower. Keep unshaped dough covered and place the finished shells on a dry tray. Cover them lightly while you prepare the rest, so the edges do not dry and crack.
Step 4: Heat the frying oil safely
Choose a deep, heavy, stable kadai and add enough fresh oil for the shells to move freely. Do not fill the pan more than halfway. Keep the outside of the pan, your utensils and the shaped dough free of water before heating.
Medium-low heat is a useful starting point. A cooking thermometer may help you monitor roughly 160–170°C, but that range is guidance, not a tested optimum for this dough. See our thermometer-calibration guide for help checking thermometer accuracy. A small piece of dough should sizzle steadily without turning dark straight away.
Step 5: Fry, check and drain
Carefully lower a few shells into the oil with a dry slotted spoon, keeping hands away from the surface. About 10–12 may fit in some kadais, but pan size decides the safe batch. Never crowd the pan or drop the shells from a height.
Turn them gently after the surface firms up. The earlier four-to-five-minute batch time is only a rough guide; thickness and oil temperature can change it. Look for even browning, slower bubbling and a crisp centre when you break open a cooled test shell.
Move the fried shells to a rack or a tray lined with absorbent paper. Let them cool fully before tasting or packing, because the centre and trapped oil remain hot after removal.
The shaping mistake that spoils the crunch
Large dough pieces make thick shells that can darken outside before their centres cook. They may also spring open in the kadai. For this wheat karam gavvalu recipe, small portions work better than lemon-sized pieces.
Start with a marble-sized ball, then check the first shaped shell. You want a clear ridge pattern and a compact curl with no thick lump at the centre. If a shell opens, make the next one smaller and press its edge down more firmly.
Shape the whole batch before you turn on the burner. That removes the pressure to work beside an unattended pan of hot oil.
Can wheat karam gavvalu be air fried?
Air frying is an experimental alternative for this dough, not a tested equivalent to deep frying. There is no documented air-fryer trial or verified time-and-temperature combination for this dough. Therefore, a fixed setting would be guesswork and cannot guarantee a cooked centre.
If you want to experiment, make a small trial with thin, evenly shaped shells. Lightly coat them with oil, place them in one layer and follow your air fryer’s instructions for preheating and monitoring. Check frequently, turn as needed and break open a cooled piece to inspect its centre.
Air-fried shells may be harder or drier. If the outside colours before the inside cooks, stop and change your method rather than serving a doughy batch.
Frying oil safety and reuse
No fixed number of reuses makes frying oil safe. The Food Safety and Standards Authority of India (FSSAI) used-oil guidance advises avoiding repeated use for frying. FSSAI also sets a 25% total-polar-compounds limit for used vegetable oil, but home cooks cannot reliably judge that chemical measure by counting fry sessions.
When frying wheat karam gavvalu, use fresh oil where practical, avoid overheating it and remove loose food particles after cooking. Discard oil that smokes unusually, forms persistent foam, darkens heavily or changes consistency. An oil that looks normal is not automatically safe for repeated frying.
Let used oil cool before handling or disposal. Never pour it down the sink. Follow local collection options, or absorb a small household quantity into waste material before placing it in a suitable rubbish bin, as FSSAI’s guidance describes.
Hot-oil precautions and allergy guidance
Keep children and pets away from the stove while frying. Stay beside the pan, turn handles inward and keep a suitable lid nearby. The U.S. Fire Administration’s cooking fire guidance also stresses close supervision and switching off the heat if oil begins to smoke.
Never pour water into hot oil or use it on an oil fire. If a small pan fire starts and you can act safely, turn off the heat and smother it with a fitting lid. If you cannot control it immediately, leave the area and call emergency services.
Wheat and semolina contain gluten. Do not serve this version to anyone with a wheat allergy or coeliac disease. Optional sesame seeds, peanut oil, ghee or spice blends can add allergens or milk ingredients. Use fresh oil and clean equipment when preparing food for someone with an allergy; shared frying oil may carry traces from earlier foods.
For kitchen allergen separation, see FSSAI-hosted allergen-handling guidance. When a guest has a serious allergy, check every ingredient label and avoid guessing whether a substitution is safe.
Troubleshooting wheat karam gavvalu
| Problem | Likely cause | What to try |
|---|---|---|
| Shells unroll | Pieces too large or dough too soft | Make smaller balls and seal the curl gently |
| Dark outside, soft inside | Oil too hot or thick centres | Lower heat and shape thinner shells |
| Greasy shells | Oil too cool or pan overcrowded | Fry fewer pieces and let heat recover |
| Ridges disappear | Dough sticks to the board | Dust the peeta lightly with atta |
| Very hard bite | Dry dough, thick shell or insufficient cooking control | Add water slowly next time and shape evenly |
| Shells soften in the jar | Trapped steam or damp storage | Cool fully and use a dry airtight box |
Test one or two shells before frying a full batch. If the centre stays soft, adjust the size and heat before committing the rest of the dough. Good colour alone does not prove that thick dough cooked through.
Substitutions and spice variations
For less heat, reduce the chilli and pepper while keeping the atta, semolina and water method intact. Some Andhra versions also use a little asafoetida or sprinkle chaat masala on the fried shells. Add dry seasoning only after the shells have drained.
Replacing part of the atta with rice flour may change the bite and the water needed. Likewise, sesame instead of ajwain changes both flavour and allergen exposure. These variations have not been tested against the base quantities, so try a small batch before changing the full recipe.
How to store the finished shells
Let the wheat karam gavvalu cool completely, then place them in a clean, dry, airtight container away from heat and moisture. Warm shells release steam, which can soften the ridges inside a closed jar. Use clean, dry hands or a spoon each time you serve them.
There is no validated shelf-life test for this homemade recipe, so do not assume it stays safe or crisp for 10–12 days. Make a quantity you can use promptly, especially in humid weather. Discard shells that develop mould, an off smell, a rancid taste or signs of contamination.
If an otherwise fresh batch loses some crispness from humidity, gentle reheating may help its texture. That does not make spoiled or improperly stored food safe. For a broader ingredient-based approach, see our guide to cooling and storing festive foods.
What about calories and nutrition?
There is no verified calorie or nutrient calculation for this exact fried batch. The amount of oil absorbed changes with shell size, frying time, temperature and draining. Therefore, giving a fixed calorie, fat or sodium figure per dozen shells would imply more precision than the recipe supports.
The ingredients include wheat flour, semolina, salt and oil, so check portions against your own dietary needs. Anyone who requires precise carbohydrate, sodium or fat figures should calculate them from weighed ingredients and measured oil uptake, preferably with a qualified dietitian.
A small-batch plan before festival cooking
Andhra families enjoy wheat karam gavvalu as a tea-time snack and during festive gatherings. Spicy shells also offer a contrast when the sweet version appears on the same table. For more festive menu ideas, see our Diwali sweets and snacks collection.
Start by shaping a few shells and frying a test batch. Note how many fit safely in your kadai, how long the centres take and whether the dough needs a little more water. Those observations are more useful for your next batch than a universal yield or cooking-time promise.
Before you start frying
For wheat karam gavvalu, keep the dough firm, the shell portions small and the oil under close watch. The original spice blend and fork-shaping option remain good starting points. However, treat yield, exact fry times, air-fryer results and storage life as variables until you test them in your own kitchen.
Use fresh oil when possible, cool the shells before sealing them and keep allergen needs in mind. These checks protect the result as well as the person cooking it.
Frequently asked questions
What does karam gavvalu mean?
Karam means spicy, while gavvalu means shells in Telugu. The name refers to the ridged shell shape and savoury seasoning. Unlike teepi gavvalu, this version does not need a sugar or jaggery syrup coating.
Can I make this recipe without a gavvalu peeta?
Yes. Use the back of a clean fork and roll a small dough ball across the tines with your thumb. The ridges may be shallower, but you can still make small curls. Avoid household tools that cannot be cleaned safely for food contact.
How long does wheat karam gavvalu take to make?
Allow roughly 90–120 minutes before final cooling when working alone. That planning range includes mixing, a 25-minute rest, shaping, heating the oil and frying several batches. Your actual time depends on pan size and the number of shells.
How many shells does this recipe make?
The yield has not been verified by a counted test batch. For wheat karam gavvalu, a few large shells produce a very different total from many small ones. Count your shaped pieces and record the result if you want a repeatable batch size.
Is wheat karam gavvalu gluten-free?
No. Whole wheat flour and semolina both contain wheat gluten. Swapping only one of them does not make the recipe suitable for someone with coeliac disease or a wheat allergy. A gluten-free alternative would need its own tested formula and careful cross-contact control.
Can I use an air fryer instead of deep frying?
You can experiment with a small portion, but this recipe has no verified air-fryer time or temperature. Arrange thin shells in one layer and follow the appliance instructions. Check the centres before serving, since browning does not guarantee even cooking.
How long can I store homemade karam gavvalu?
No fixed shelf life has been tested for this batch. Let the shells cool fully and store them in a dry, airtight food-safe container. Humidity, cleanliness and frying quality affect how long they remain crisp. Discard anything that seems spoiled or contaminated.
Can I reuse the frying oil twice?
Do not rely on a fixed reuse count as a safety rule. FSSAI advises avoiding repeated frying in the same oil, and its chemical quality limit cannot be judged by the number of uses alone. Fresh oil is the simpler option for another frying session.
Is the original version vegan?
Yes, the listed ingredients use vegetable oil instead of ghee and contain no intended animal products. Check spice blends for added ingredients, and avoid ghee if keeping the recipe vegan. Wheat and gluten are still present.
Can I make the dough ahead?
You can cover the dough and refrigerate it promptly if you need to pause preparation. However, this formula has no tested make-ahead holding period. Do not leave raw dough at room temperature for long periods, and discard it if storage conditions are uncertain.