Baked Coconut Gujiya Recipe: Untested Diwali Trial
Baked coconut gujiya is an oven-cooked take on the half-moon Indian sweet, with a ghee-rich pastry shell and a fragrant coconut filling. The difficult part is not shaping the crescent. It is keeping the seam closed while the crust becomes crisp without deep-frying.
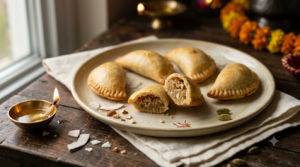
Illustration of the intended baked coconut gujiya with golden crescent shells and a coconut-cardamom filling; the recipe remains untested.
Recipe status: untested kitchen trial. Bhimas Cook has not baked and assessed this exact formula. The quantities, temperature, timings and expected yield below are a measured first-batch plan, not verified results.
Food-safety check: Fully bake the pastry, including the thick folded seam, before cooling or tasting. Never taste raw dough or serve a gujiya with undercooked pastry in the centre. Cooling does not cook raw flour or make underbaked pastry safe.
Baked Coconut Gujiya at a Glance
- Style: eggless, oven-baked festive pastry with desiccated coconut, cardamom and nuts.
- Trial batch: aim for approximately 14 medium gujiyas; count the actual pieces after shaping.
- Proposed oven setting: 180°C with conventional heat or 170°C with a fan.
- Proposed baking window: begin checking at 18 minutes; allow roughly 22–28 minutes if needed.
- Pastry size: roll circles about 10–11 cm wide and 2–3 mm thick.
- Filling: about one level tablespoon per pastry, adjusted to prevent overfilling.
- Test goal: fully cooked pastry through the thick folded edge, a firm base and a tender coconut filling without leaks.
All yield and timing figures are trial targets because dough hydration, filling moisture and ovens vary. Set aside a little extra time for the first batch, since troubleshooting is part of this experiment.
Baked Coconut Gujiya Ingredients: First-Batch Formula
Weigh the flour and coconut if you have a kitchen scale, since cup measures vary by brand. The figures below form a proposal for a small batch, not a claim of a successful test.
For the pastry shell
- 250 g plain flour (maida), approximately 2 level cups
- 55 g melted and cooled ghee, approximately 4 tablespoons
- 1/4 teaspoon fine salt
- 85–105 ml cool water, added gradually
- A little extra flour for rolling, only when needed
For the coconut filling
- 120 g unsweetened desiccated coconut, preferably fine
- 70 g white sugar, preferably powdered or finely ground
- 60 ml milk, approximately 1/4 cup
- 25 g finely chopped almonds or cashews
- 1 teaspoon ghee
- 1/2 teaspoon cardamom powder
- One small pinch of salt
For finishing the pastries
- 1 tablespoon milk for a light top brushing
- 1 teaspoon melted ghee, optional, for mixing into the brushing milk
- 1–2 teaspoons plain water for sealing the edges
This baked coconut gujiya version contains wheat, milk and potentially tree nuts. If serving guests, disclose those ingredients and check packaged coconut for added sweeteners. Unsweetened coconut matters because pre-sweetened coconut changes both filling moisture and sweetness.
How to Make Baked Coconut Gujiya Step by Step
This method separates filling, dough and shaping, so each stage has its own check. Do not rush into assembly while the filling is hot. Warm filling softens the fat in the shell and may push the seam apart during baking.
Step 1: Cook and cool the coconut filling
- Warm 1 teaspoon ghee in a heavy pan over low heat, then add the coconut.
- Stir for about 1 minute to warm the coconut without browning it.
- Add the sugar and milk, then mix until the coconut absorbs the liquid.
- Cook gently for a proposed 4–7 minutes, stirring often, until no free milk pools in the pan.
- Switch off the heat and add the nuts, cardamom and pinch of salt.
- Spread the filling on a clean plate and let it cool completely before using.
The filling should clump when pressed but break apart under a spoon. If it looks glossy and wet, return it to low heat briefly. If it becomes hard or powdery, note that result before adding any liquid, since a correction can change the trial.
Step 2: Rub ghee into the flour and rest the dough
- Mix maida and salt in a bowl, then add the cooled melted ghee.
- Rub with your fingertips until the flour resembles fine crumbs.
- Add 85 ml water in stages and gather the mixture into a firm dough.
- Add more water a teaspoon at a time only if dry flour remains.
- Knead briefly until the surface joins, then cover and rest for 25–30 minutes.
The rest gives the flour time to hydrate, so the dough should roll more evenly. Avoid a long, hard knead because a chewy shell is not the goal. Keep the dough covered while you work on each pastry.
Step 3: Roll, portion and fill the circles
- Divide the dough into portions, aiming for about 14 equal pieces initially.
- Roll one piece into a circle around 10–11 cm wide and 2–3 mm thick.
- Place one level tablespoon of cool filling on one half, leaving a clear border.
- Keep at least 1 cm of dough free around the curved edge.
- Lightly dampen that border with water, then fold the empty half over the filling.
Push air away from the centre as you fold, but do not squash the filling. When the filling reaches the edge, the seam cannot grip properly. Remove a little filling if the crescent looks swollen or difficult to close.
Step 4: Double-seal every crescent
- Press the curved seam together firmly with your fingertips.
- Use a fork to crimp across the entire curve without piercing the filling pocket.
- Check for loose flour or coconut crumbs along the seal.
- Place each crescent on a parchment-lined metal baking tray.
- Chill the tray for 10–15 minutes if the shaped pieces feel soft or oily.
King Arthur Baking’s hand-pie guidance also stresses a firm fork seal and a generous margin. Those principles apply here, although its fruit-pie baking time does not establish the correct setting for gujiya. This baked coconut gujiya trial must still confirm its own results.
Step 5: Brush, bake and cool
- Preheat the oven fully to 180°C on conventional heat, or try 170°C with the fan on.
- Keep the rack in the centre and allow space between the gujiyas.
- Brush only the tops lightly with milk, or milk mixed with a little ghee.
- Bake and inspect from 18 minutes onward; record the appearance at each check.
- Use 22–28 minutes only as an initial planning window, not a guaranteed finish time.
- Before removing the tray for cooling, confirm the pastry has baked through, especially at the thick folded seam. Colour alone does not prove doneness.
- For the trial, carefully cut open one pastry with a clean knife and inspect the inner dough without tasting it. If you find sticky, raw-looking pastry, continue baking and check again.
- Only after the dough is fully baked should you cool the pastries briefly on the tray, then transfer them to a rack before tasting.
Baked Coconut Gujiya Baking Temperature and Doneness
The proposed starting point for baked coconut gujiya is 180°C without a fan or 170°C with a fan. Actual oven behaviour can shift the finish substantially. Therefore, colour and base texture matter more than a rigid timer.
Preheat thoroughly because putting pastry into a cool oven can let ghee seep out before the shell sets. A heavy dark tray may brown the base faster than a light tray. Also, an oven thermometer can reveal whether the displayed setting matches the heat inside.
Look for gently golden edges, a firm underside and a shell that holds its shape. Also check that the inner pastry near the fold is cooked through, not sticky or doughy. If the outside browns while the inner dough remains raw, lower the heat slightly and continue baking until the pastry cooks fully.
Only then let one cool before assessing crispness. Do not taste raw dough or serve undercooked gujiya; cooling alone does not make it safe. The US Food and Drug Administration warns that untreated flour may carry harmful germs, so flour-containing dough must be properly cooked before eating.
Sealing Tricks That Matter More Than Fancy Pleats
A beautiful rope-style crimp is optional, but a clean border is essential. The edge must contain only dough and a very thin film of water, since coconut particles stop the layers bonding. Press firmly before adding decorative folds.
Also keep the filling dry enough to spoon rather than spread. A wet filling can release steam and syrup as the oven heats, creating pressure along the weakest seam. Do not pierce the sides with a fork; use its tines only on the border.
If your first two gujiyas leak, stop shaping the rest. Reduce the filling slightly and widen the border on the next pair. This paired comparison tells you more than baking a full tray with the same mistake.
First-Batch Test Sheet for the Oven
This trial becomes repeatable only when you record what actually happens. Write down the final water added, the size of the circles, the oven mode and the number of pieces. Confirm the pastry is fully baked before cooling, and taste it only afterward.
| Test point | Starting target | What to record |
|---|---|---|
| Water in dough | 85–105 ml | Actual ml and dough feel |
| Pieces shaped | About 14 | Actual yield and size |
| Crust thickness | 2–3 mm | Thin, even or thick |
| Filling per piece | One level tablespoon | Leaks or intact seams |
| Oven setting | 180°C conventional | Fan mode and tray type |
| Finish time | Check from 18 minutes | Actual time and colour |
| Doneness before cooling | Fully cooked inner pastry and fold | Cut-open visual check; no raw dough |
| After cooling | Crisp shell, soft coconut filling | Snap, taste and moisture |
Baked Gujiya Versus Fried Gujiya
Baked coconut gujiya keeps the crescent shape of the traditional fried sweet but changes the heat source. India’s official tourism food guide describes gujiya with a maida shell, coconut, nuts, mawa and cardamom. The table compares methods, not measured nutrition or confirmed results from this batch.
| Feature | Oven-baked trial | Traditional fried style |
|---|---|---|
| Cooking medium | Hot oven and greased dough | Hot frying oil or ghee |
| Texture target | Dry, crisp pastry shell | Flaky, fried crust |
| Batch process | Tray cooks several together | Pieces fry in batches |
| Main risk | Hard shell or pale fold | Oil temperature and greasiness |
| Recipe status | Not kitchen-tested here | Established cooking style |
Do not calculate a calorie saving from these cooking methods alone. The shell already contains ghee, while frying absorption varies by dough and temperature. If nutrition data matters, weigh the cooked batch and use a validated nutrient calculation.
Ingredient Swaps Worth Testing Separately
Can fresh coconut replace desiccated coconut?
Fresh grated coconut can work, but it brings more moisture into the filling. Therefore, this exact formula would no longer apply without testing. Cook the grated coconut mixture longer, cool it completely and record the drained or cooked weight. A wetter centre may soften the pastry even after a good bake.
What about jaggery, mawa or whole wheat flour?
Jaggery brings a deeper flavour but also changes the melting and moisture behaviour. Start a separate small trial rather than swapping it gram for gram without checking. For another coconut-based festive sweet, see Bhimas Cook’s coconut-jaggery modak guide.
Mawa adds dairy solids and makes the filling richer, but it also changes handling and storage. Whole wheat atta can make the shell denser because its bran interrupts the pastry texture. Test these variations one at a time so the cause of any change stays clear.
Fixes for Leaks, Cracks and Hard Pastry
If baked coconut gujiya fails on the first attempt, inspect one symptom rather than changing the entire recipe. The following fixes are diagnostic suggestions for the next test, not proven corrections to this untested formula.
| Problem | Likely cause | Next test |
|---|---|---|
| Seam opens | Too much filling or dusty edge | Clean, widen and fork-seal border |
| Shell cracks while folding | Dry dough or uneven roll | Rest longer; add tiny water increments |
| Base burns first | Dark tray or high bottom heat | Use light tray; move rack upward |
| Shell seems hard | Thick dough or heavy kneading | Roll thinner; handle dough less |
| Filling leaks syrup | Mixture too wet or hot | Cook drier; cool before filling |
| Crust softens later | Trapped warmth or moist filling | Cool fully before packing |
Try baking only two pastries first when working with an unfamiliar oven. That small pilot leaves enough dough and filling for a correction. The same caution appears in Bhimas Cook’s baked methi mathri trial, which also separates proposed settings from kitchen results.
Cooling, Storage and Diwali Gift Packing
Only fully baked coconut gujiya should move to the cooling rack. Cooling cannot finish cooking a raw centre or remove germs from uncooked flour. Once baked through, let the pastries cool fully before packing. Steam trapped in a warm box softens the crust, especially near the thicker folded edge.
This recipe uses milk, so do not promise a long room-temperature shelf life. Refrigerate promptly and treat it as a perishable homemade sweet while its keeping quality remains untested. The USDA Food Safety and Inspection Service advises refrigerating perishable leftovers within two hours and generally using refrigerated leftovers within three to four days. In heat above 32°C, shorten the unrefrigerated window to one hour.
Those are general food-safety limits, not a shelf-life validation for gujiya. Keep the sweets chilled during transport, particularly in warm weather. If you want a crisp serving texture, rewarm one briefly in an oven and assess it before reheating the rest.
Before You Make a Full Batch
Baked coconut gujiya is a promising festive experiment, not yet a verified result from the Bhimas Cook kitchen. The key decisions are a crumbly ghee-rich dough, a cooled coconut filling and a firm double seal. Start with two pastries, record the actual baking time and inspect the base before scaling up.
For a wider festive menu, pair this trial with Bhimas Cook’s Diwali sweets recipes. Once a kitchen test confirms flavour, texture, yield and storage, update this page with measured results rather than calling the first-batch plan foolproof.
Baked Coconut Gujiya: Frequently Asked Questions
Can I make baked coconut gujiya without frying?
Yes, the planned method uses an oven instead of deep-frying. The dough still contains ghee, so it is not a fat-free pastry. This specific formula needs a real bake to establish whether it delivers the desired crispness.
What oven temperature should I try first?
Start the trial at 180°C with conventional heat or 170°C with a fan. Begin checking at 18 minutes, but do not stop solely because the timer ends. Bake until the inner pastry and folded seam cook completely before cooling or tasting.
How do I stop gujiya from opening in the oven?
Leave a wide clean edge, use only a little water and press the seam firmly. Next, crimp the full curve with a fork. If one leaks, use less filling and remove coconut crumbs from the border on the next attempt.
Can I use dry coconut for the filling?
Yes, this trial specifically uses 120 g unsweetened desiccated coconut. Milk adds moisture while the mixture heats, so stop when no loose liquid remains. Sweetened coconut may change both the sugar balance and the final consistency.
Why is my oven-baked gujiya hard instead of flaky?
Possible causes include a thick shell, overworked dough or excessive baking. For the next test, roll more evenly and knead only until the dough gathers. Check that the pastry is fully baked before cooling and tasting it.
Can I prepare coconut gujiya in advance for Diwali?
You can plan the filling and shaping ahead, but this particular batch has no verified keeping-life result. Chill perishable ingredients promptly and keep the finished sweets refrigerated. Test the crust after storage before promising gift-box quality.
Is this a tested Bhimas Cook recipe?
No. This is an explicitly untested first-batch formulation with proposed weights, oven settings and diagnostic checks. A future kitchen bake must confirm the quantity, finish time, taste and texture before the page can claim a tested recipe.