Medu Vada Recipe Air Best Air Fryer Instant Cooking
Medu Vada Recipe Air – Best Air Fryer Instant Cooking Procedure At Home
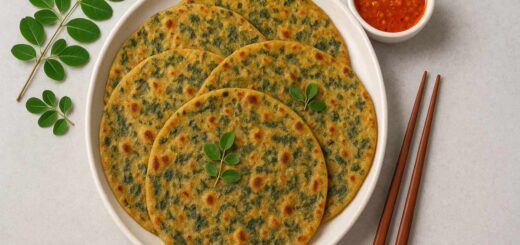
Medu Vada Recipe Air is a healthier take on the classic South Indian fritter, allowing you to enjoy crispy golden vadas with minimal oil using your air fryer. Medu vada (also called ulundu vadai or garelu in Telugu) are made traditionally from soaked urad dal and shaped into doughnut-style fritters. These fritters are usually deep-fried, but air frying transforms them into lighter, less oily snacks while retaining a crisp exterior and soft interior. Medu vada are widely eaten as breakfast or snacks in South India and pair perfectly with sambar and coconut chutney.
Recipe Card
| Prep Time | 4 hrs 30 mins (including soaking) |
| Cook Time | 15–18 mins (Air Fryer) |
| Servings | 8 vadas |
| Difficulty | Moderate |
Ingredients (Exact Quantities)
- 1 cup urad dal (dehusked black gram)
- 3–4 green chillies, finely chopped
- ½ cup finely chopped onions (optional)
- 1 tbsp finely chopped fresh coriander leaves
- 1 tsp cumin seeds (jeera)
- ½ tsp crushed black pepper
- ¼ tsp asafoetida (hing)
- 1 tsp salt (adjust to taste)
- 2 tbsp rice flour (for crispiness)
- Water (as needed for grinding)
- Oil spray or 1–2 tsp oil (for air frying)
Step-By-Step Instructions
1. Soaking Urad Dal
Wash 1 cup of urad dal under running water 4–5 times until water runs clear. Soak the dal in ample water for at least 4 hours. This soaking softens the dal, making it easier to grind into a smooth batter.
2. Grinding The Batter
Drain all soak water from the dal. Add the soaked dal to a blender or mixer grinder. Add very little water — just enough to grind to a smooth, thick, and fluffy batter (similar to a cake batter consistency). Too much water will make the vadas dense. Understanding Medu Vada Recipe Air is essential.
3. Mixing Ingredients
Transfer the batter to a large bowl. Add chopped green chillies, onions, coriander, cumin seeds, crushed pepper, asafoetida, rice flour, and salt. Mix thoroughly until everything is well combined. The rice flour helps create crispier vadas in air fryer.
4. Aerating The Batter
Using clean hands or a whisk, beat the batter for 3–4 minutes to incorporate air. This step is important for fluffy vadas with a soft inside and crisp outside. A light and airy batter gives the best texture.
5. Preheat Your Air Fryer
Set your air fryer to 180°C / 360°F and preheat for 3–5 minutes. Preheating ensures even cooking and prevents sticking. Having a properly hot basket helps crisp the vadas faster. This relates to Medu Vada Recipe Air.
6. Shaping The Vadas
Grease your hands or lightly dampen them with water. Take small portions of batter (about 2 tbsp each) and shape into round doughnuts with a hole in the centre. This classic “vada” shape cooks more evenly. You can also make small bite-sized rounds if preferred.
7. Air Frying Process
Place the shaped vadas in the air fryer basket lined with perforated parchment paper or directly if your fryer has a non-stick basket. Make sure they are not touching. Lightly spray or brush oil on top of each vada.
Air fry at 180°C / 360°F for 8 minutes. Then, gently flip each vada and spray a little more oil. Air fry for another 8–10 minutes until golden brown and crisp. If you want an extra crunch, increase the temperature to 200°C / 390°F and air fry for an additional 2–3 minutes. Learn more about Medu Vada Recipe Air.
8. Serving
Once golden, remove the vadas from the air fryer and place them on paper towels to absorb any residual oil. Serve hot with traditional sides like sambar and coconut chutney.
Pro Tips (From My Kitchen)
- Consistency Matters: The batter should be thick and holds shape easily. Thin batter leads to flat and chewy vadas.
- Don’t Skip Aeration: Airy batter makes the inside soft and fluffy. I often spend an extra minute whipping it — worth it!
- Even Cooking: Flip the vadas halfway through to ensure uniform crispiness on all sides.
- Oil Lightly: A light spray on both sides makes vadas crisp without deep frying.
- Shape Size: Medium-sized vadas cook evenly — too large may stay undercooked in centre.
Chef’s Notes
Substitutions
If you don’t have rice flour, you can use gram flour (besan) or a small amount of semolina (sooji) to help with crispiness. For heat, swap green chillies for red chilli flakes. You can also add finely chopped ginger for an aromatic twist.
Storage Tips
Store leftover cooked Medu Vada in an air-tight container in the fridge for up to 2 days. Reheat in the air fryer at 180°C / 360°F for 3–4 minutes to restore crispiness. Uncooked batter can be refrigerated for up to 24 hours — but best used fresh.
Nutrition Information (Per Serving – One Vada)
| Calories | ≈ 90–120 kcal |
| Protein | ≈ 6–7 g |
| Carbohydrates | ≈ 14–18 g |
| Fat | ≈ 1–3 g (air fried) |
| Fiber | ≈ 3–6 g |
| Sodium | ≈ 245–280 mg |
Air frying Medu Vadas significantly cuts down oil and calories compared to traditional deep frying, which typically yields 190+ calories per piece.
Frequently Asked Questions
Can I skip onions in the batter?
Yes. Traditional temple style medu vada often excludes onions. You can enjoy them with just spices and herbs.
Why isn’t my vada crispy?
If your batter is too wet or dense, the vada won’t get crispy. Ensure the batter is thick and aerated well.
Do I need parchment paper?
Using parchment paper helps prevent sticking, but a well-greased non-stick basket also works.
What chutneys pair best?
Coconut chutney and spicy sambar are the classic accompaniments. If you’re unsure how to make authentic chutney, you can follow the recipe on Wikipedia: Chutney.
Final Thoughts
Medu Vada Recipe Air offers a guilt-free way to enjoy this beloved South Indian fritter without deep frying. The air fryer gives you golden, crisp surfaces with soft centres that stay true to the essence of medu vada while cutting down oil and calories. I personally recommend trying this version when you want a delicious and satisfying snack without the mess of traditional frying.